 Caption Keeper
How to save a Microsoft Teams meeting transcript
A transcript lets you check who said what, write minutes and find a detail weeks later. Teams can make one, but not in every meeting.
Option 1: Teams transcription
- During the meeting, open More, then Record and transcribe, then Start transcription.
- After the meeting, the transcript appears in the meeting chat and the recap, where it can be viewed and, depending on policy, downloaded as a .docx or .vtt file.
Transcription has to be allowed by your organization, and usually only the organizer or a presenter can start it. Participants from other organizations and guests often can't download it.
Option 2: keep a transcript from live captions
Live captions are available to every participant, even when nobody starts transcription. Caption Keeper saves them as a transcript on your computer while the meeting runs.
- Install Caption Keeper and join from Teams on the web in Chrome or Edge.
- Turn on live captions: More (…), Language and speech, Show live captions.
- Every line is saved automatically, with speaker names and times. Nothing to start or stop.
- After the meeting, click the Caption Keeper button in the toolbar and open All transcripts.
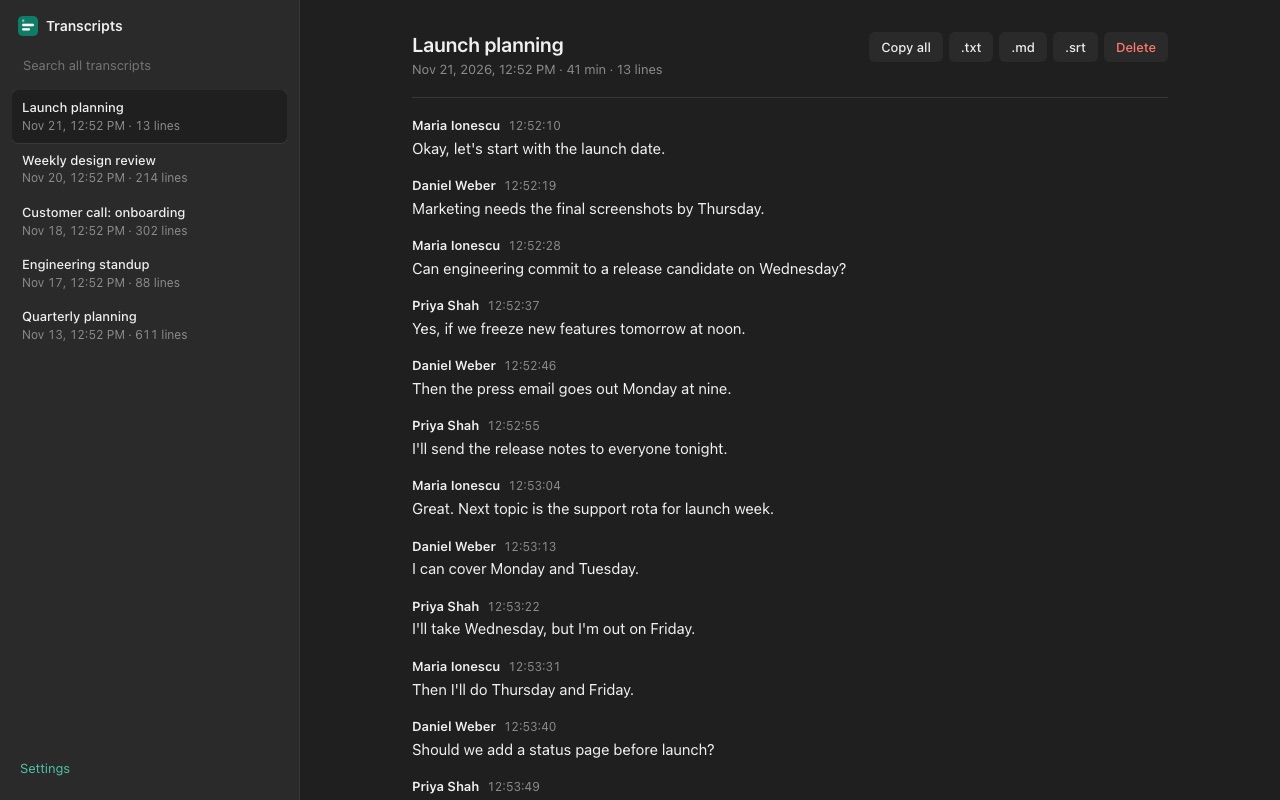
From there you can search across all meetings, rename them, copy the text, or export it as plain text, Markdown with speakers grouped, or .srt subtitles.
Only captions shown while you have live captions on are saved. Turn them on as the meeting starts. Follow your organization's policy and local law on keeping meeting notes.
Try Caption Keeper
Free for Chrome and Edge. No account, and your transcripts stay on your computer.